If you want a faster internet experience on Apple iPhone, iPad, or any other iOS device, you should know how to change DNS settings.
You can learn about the steps to modify DNS on Mac if necessary.
Your internet service provider (ISP) usually assigns a DNS, but it might not be the fastest or most reliable option. Switching to a public DNS like Google, Cloudflare, or OpenDNS could significantly improve your browsing speed and overall performance.
How to Change DNS in iPhone/iPad or Any iOS Devices
Changing DNS on your iPhone/iPad or iPod is also very easy. You can change DNS for both Wi-Fi and Cellular networks. However, without a third-party app, you can't do it for cellular.
Change DNS on iPhone/iPad/iPod for Wi-Fi
You can do it by following these instructions.
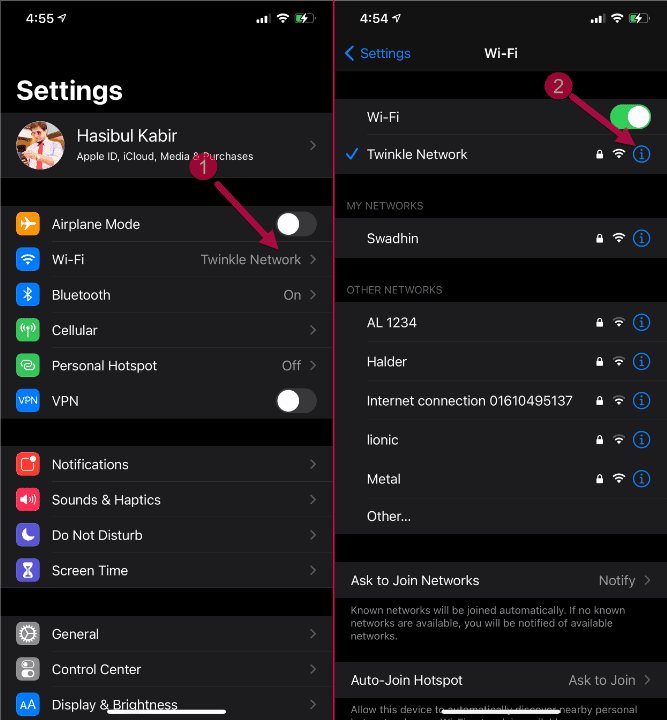
- First, go to Settings > Wi-Fi.
- Then, tap on the exclamatory sign next to your Wi-Fi network name.
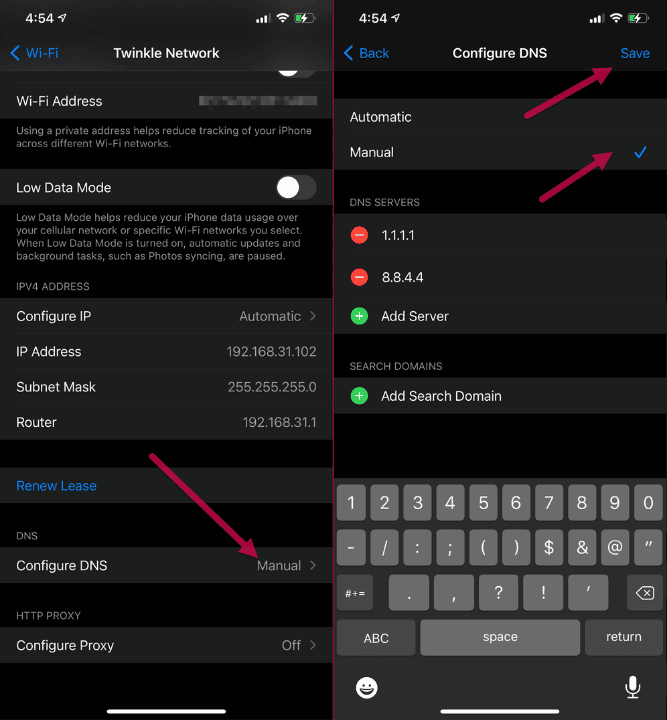
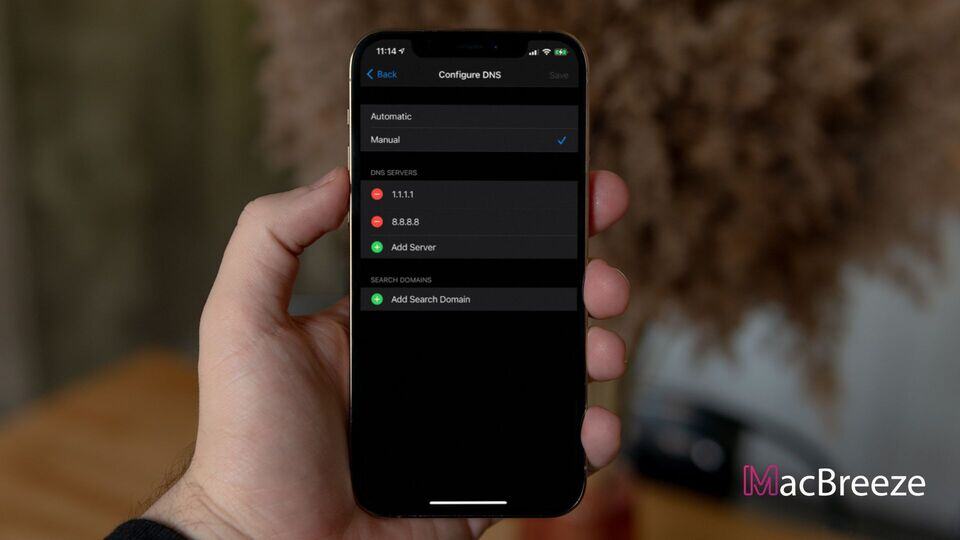
- Now, tap on Configure DNS.
- Set the settings to Manual and add/change your DNS addresses.
- At last, save the settings.
In this way, you can change DNS settings on iPhone, iPad, or iPod for Wi-Fi.
Change DNS on iPhone/iPad/iPod for Cellular Data (3G, 4G, 5G)
Apple has not made any option to change DNS for cellular data. So, if you rely on a 4G or 5G connection, you will need a third-party app. There are some third-party DNS-changing apps. You can use any of them you want.
But I suggest an app called "Trust DNS." It allows you to choose from preset DNS addresses. It also has the option to set your own preferred DNS. After choosing your DNS, you can tap on connect. It will use your DNS through a VPN network.
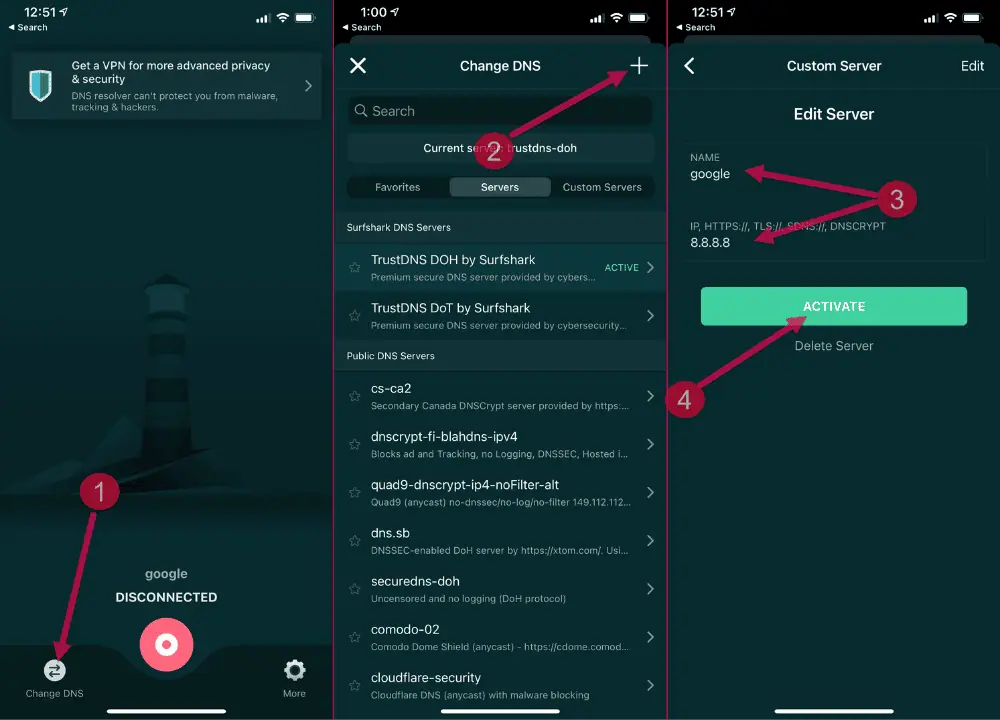
All third-party apps can't change DNS directly. These are kinds of VPN services that pass your traffic through VPN tunnels. The app I have mentioned above is no different. It is an app from Surfshark VPN.
Verify if the DNS change has started taking effect
Flushing DNS or restarting your device usually makes your DNS changes take effect. But to be sure, you can verify if the change worked.
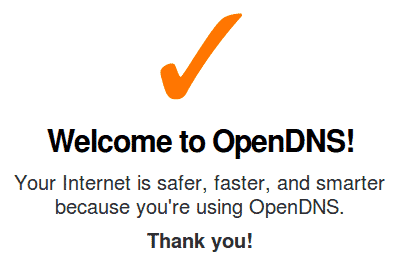
One easy way is to set your DNS to 208.67.222.222 and 208.67.220.220. Then, on your iPhone or Mac, visit OpenDNS Welcome page. If you see a "Welcome to OpenDNS" message, your DNS change was successful. If not, check your DNS settings and flush the DNS cache again.
This article explains how you can change DNS settings on your iPhone, iPad, or iPod. If you know of any better methods, feel free to share them in the comment box.