Do you know that you can back up your iPhone via WiFi or Local Network automatically? It can help you to avoid connecting lightning cables with PC every time you want to run the backup process. However, This article explains how to do it effectively on Windows and Mac.
We should always have a backup of our data. It will allow us to restore it when needed. iPhone is the first choice for many users. However, many of us don't know how to manage our iPhone/iPad or iPod backup effectively.
There are actually two main ways to back up your iPhone. One is using iCloud. But many people may not want to do it. Because iCloud comes with only 5 GB of free storage. You will have to pay for additional storage.
In this case, Many iPhone users prefer keeping the backups on their PC or Mac. When it comes to keeping a backup on a PC, connecting a USB cable comes to mind first. But You can do it wirelessly, too.
You may wonder why we are focusing on local backup. To get rid of your confusion, read: Why Local Backup is Better than iCloud
How to Back Up Your iPhone/iPad/iPod via WiFi or Local Network Schedule-Wise to PC or Mac
For this purpose, iTunes is Apple's official solution. However, it doesn't properly fulfill all users' needs. So, there are some third-party solutions, and these are also very popular. However, if you wish to back up your iPhone via WiFi or Local Network, here are the methods you can follow.
1. Finder or iTunes - Sync Over WiFi
If you don't have a third-party premium iPhone manager, you may be relying on Finder or iTunes for backup. Nevertheless, you don't need to connect the lighting or USB-C cable for this because you can do it wirelessly. iTunes and Finder have a feature that allows your PC or Mac to sync with your iPhone over WiFi.
If you don't know how to enable it, follow these steps:
- First, connect your iPhone with a type-C or lightning cable with your Mac.
- Open Finder.
- Look at the sidebar and click on your iPhone name.

- Mark Back up all of the data on your iPhone to this Mac, as shown in the screenshot.
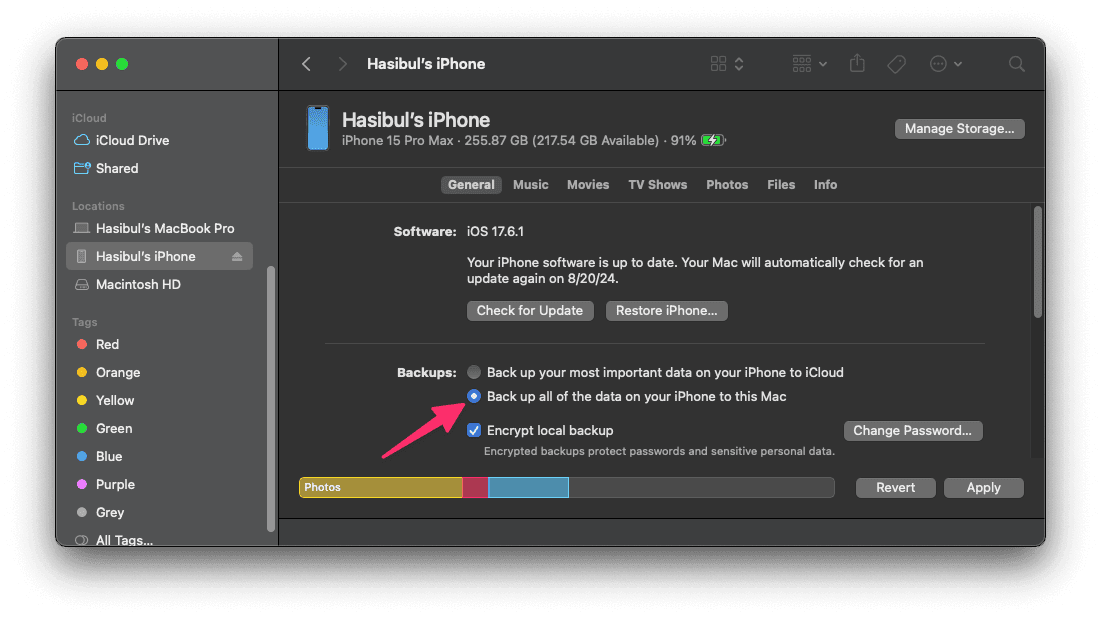
- Scroll down a bit.
- Tick Show this iPhone when on Wi-Fi and click on Apply.
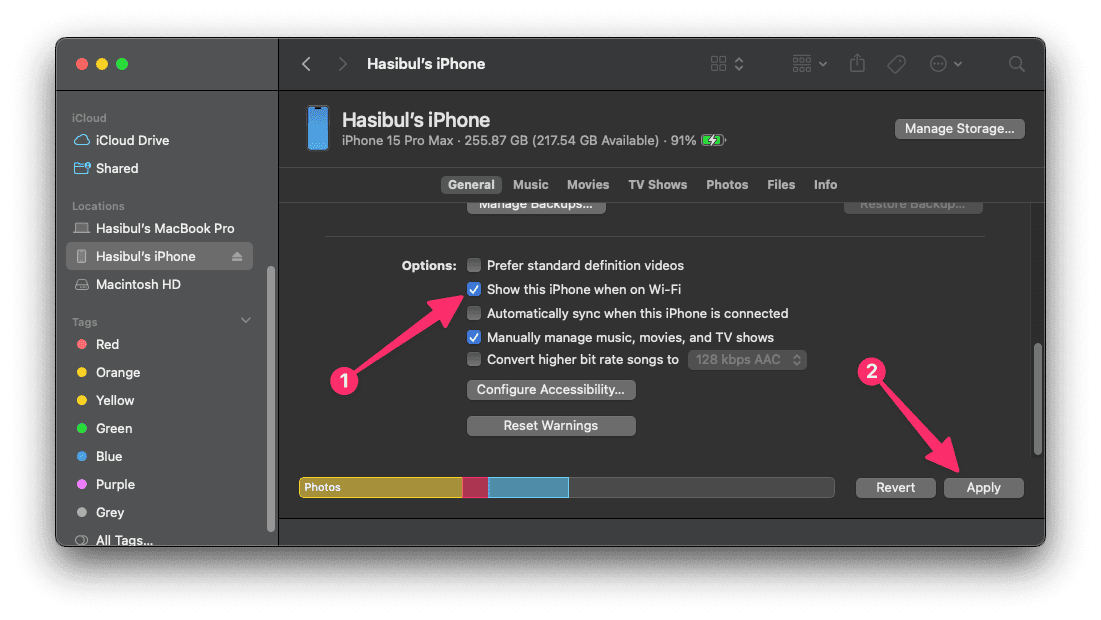
- Then, click on OK.
If you are a PC user, please follow these steps:
- First, Open iTunes and connect your iPhone via a USB cable.
- Then, Click on the Phone icon on iTunes and go to Summery. Check "This Computer" under the Automatically Back up section.
- Now, Scroll down and find the option "Sync with this iPhone over Wi-Fi" and "Automatically sync when this iPhone is connected." Tick these options and click on Apply.
- Done.
Now, iTunes can back up your iPhone via WiFi automatically. It has some issues. There is no schedule backup option in iTunes. Also, It seems unstable. Sometimes, iTunes fails to detect the iPhone over WiFi. So, you may want to rely on iMazing or Anytrans.
2. iMazing - WiFi Backup
iMazing is my personal favorite. It is one of the best iTunes alternatives. However, it can do some tasks better than iTunes. Unfortunately, It's not free software. But It's worth your money.
One of the best features of this iPhone Manager is Wireless backup. This means that iMazing can back up your iPhone/iPad/iPod via WiFi without you having to connect a cable. The great thing is it can sync everything through your local network, too.
For example, you have a desktop that is connected to the home network/internet via ethernet. Your iPhone is connected to the same home network via WiFi. In this case, iMazing can also back up your iPhone via your local network. It is enabled by default. If you want to know more about this software, Read: iMazing Review.
However, if the wireless backup feature is not enabled in iMazing, you will have to enable it manually. To do this, follow these steps.
Step 1: Enable WiFi Connection
By default, iMazing should have this option enabled. If not, follow these steps.
- First of all, download and install the iMazing.
- Now, Connect your iPhone/iPad via a USB cable.
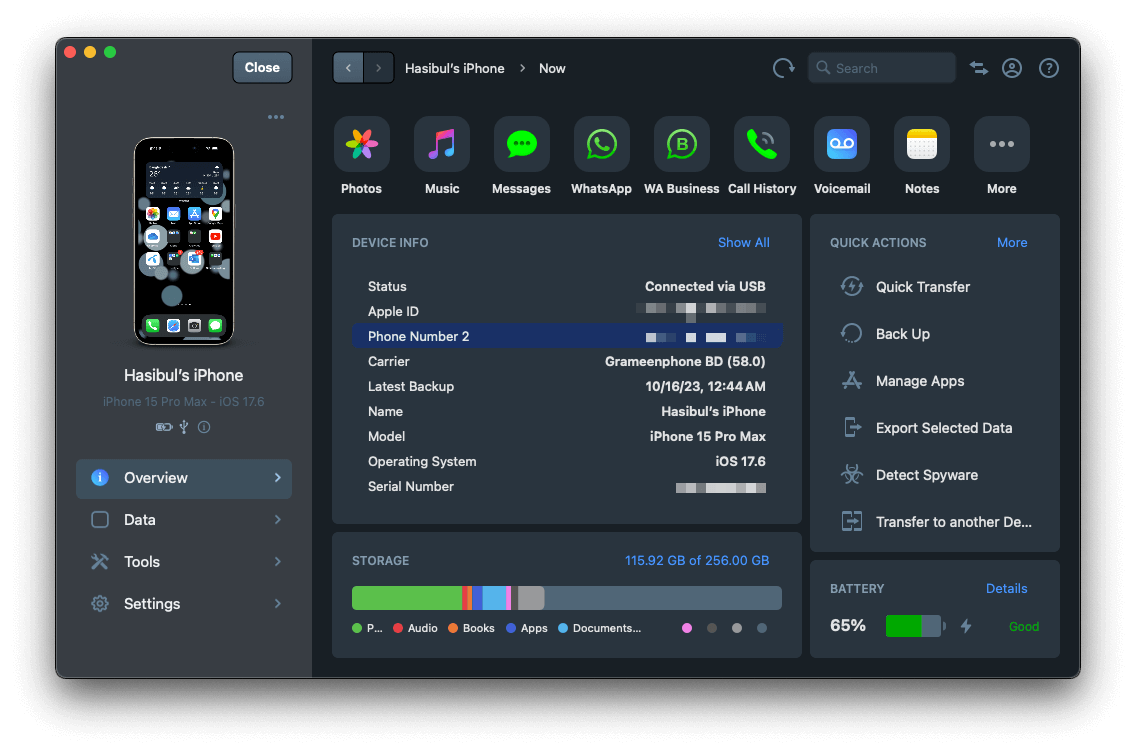
- iMazing will automatically detect your phone. An option will appear on your iPhone. You should allow your PC/Mac from your iPhone.
- Go to your iPhone option on iMazing.
- Navigate to the Settings, click on WiFi connection and then enable it.
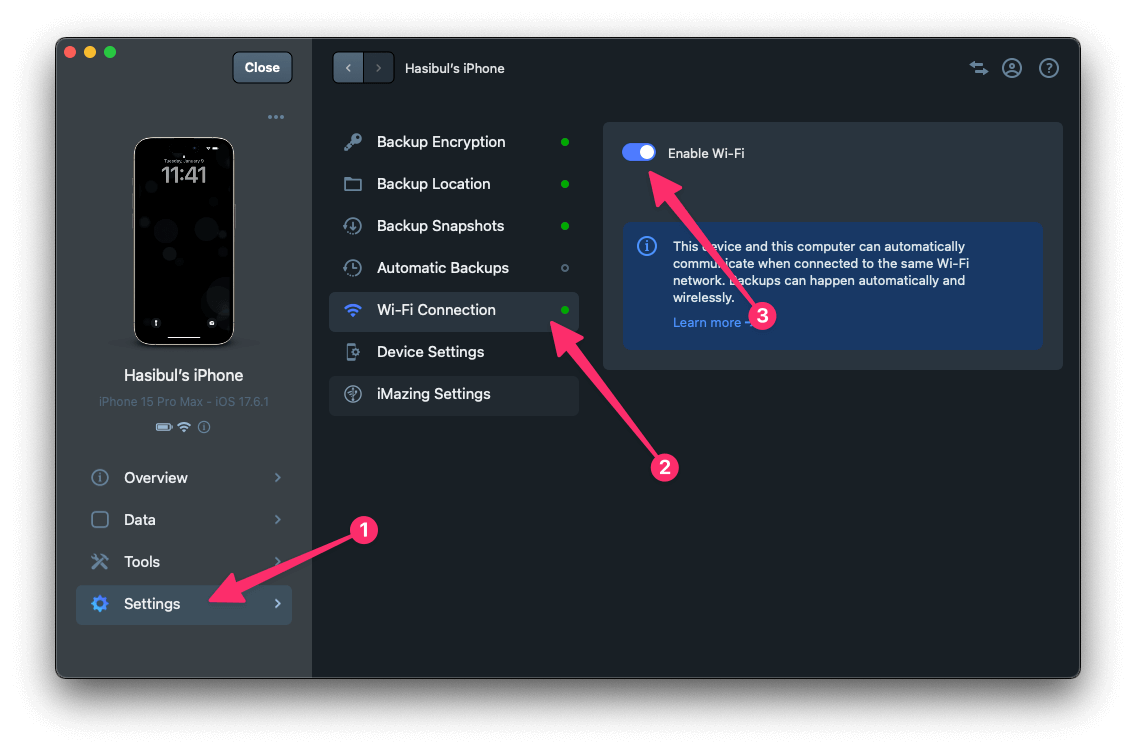
- It should now be detectable when both your PC/Mac and iPhone is in the same network.
If everything seems alright, move to the next step.
Step 2: Enable Automatic Backup and Configure Schedule
iMazing has a very cool automatic backup feature. You can set your preferred schedule and timeframe. It will ensure that iMazing will back up your iPhone. However, here are the steps:
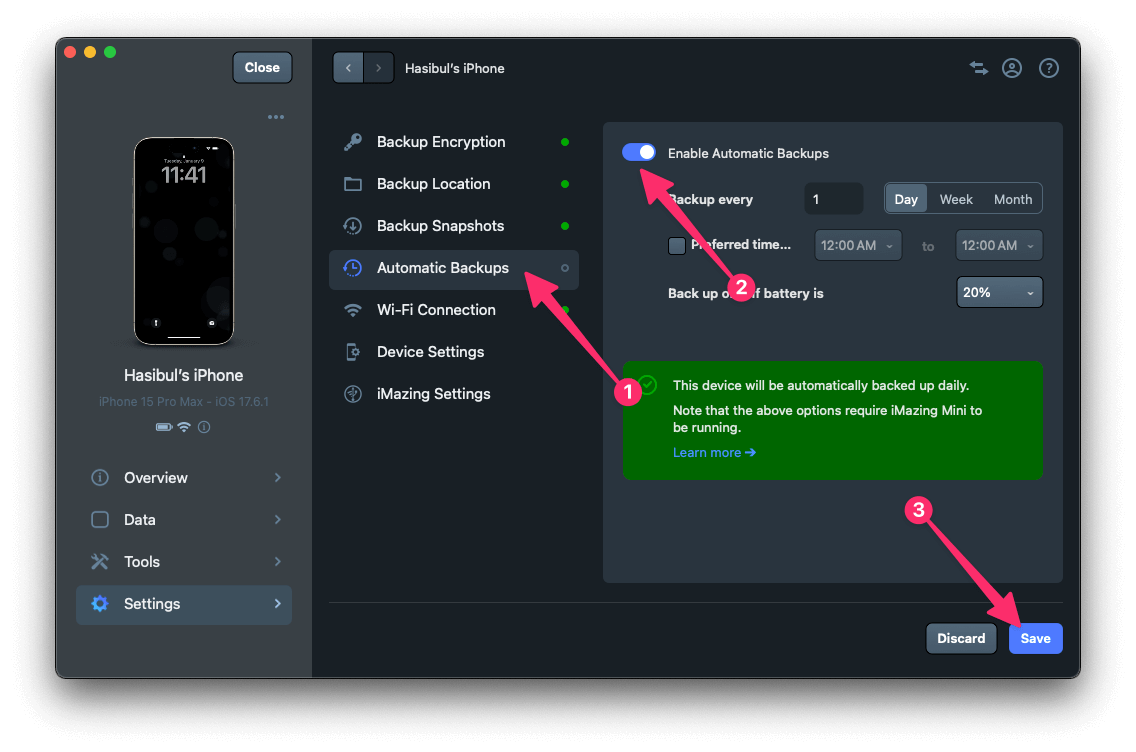
- Go to Settings like the previous step.
- Now, navigate to the Automatic Backups, enable it, set your preferred schedule and then click on Save.
From now, iMazing will back up your iPhone via WiFi/Local Network automatically. You won't have to connect your phone through a lightning cable.
3. Anytrans - Air Backup
iMobile Anytrans is another cool iPhone manager that has a decent wireless backup feature. It is called Air Backup. Like iMazing, It can also back up your iPhone via WiFi or a Local Network. You also can set your preferred schedule manually. You can learn more about this software in this iMobie Anytrans Review.
However, to back up your iPhone wirelessly using Anytrans, follow this instruction.
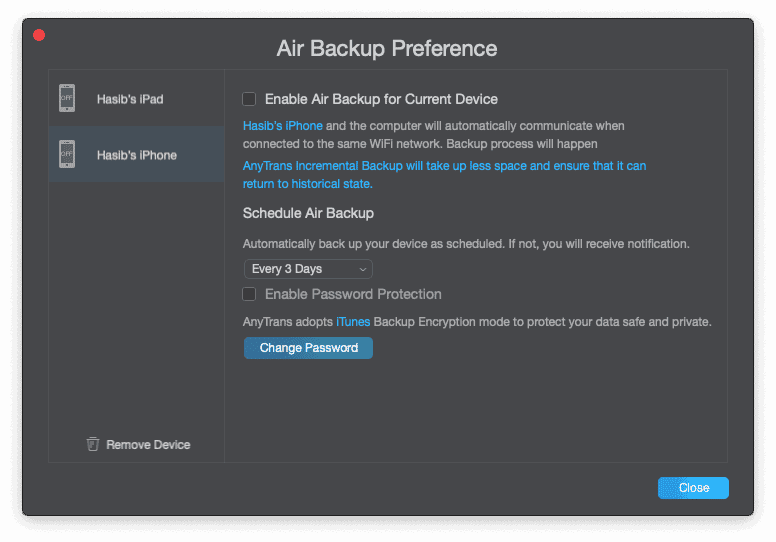
- First, Connect your iPhone using a USB cable and open Anytrans.
- Then, open the Air Backup Preference and enable this feature.
- You can also configure your own schedule for backup.
4. Backup Using iCloud
iCloud can be another option if you don't like to store your data locally. There are many advantages and disadvantages of using iCloud for backup. The first advantage is you won't have to rely on your PC or Mac for restoration. You can go anywhere and restore your data.
Also, When you buy a new device and log in using your Apple ID, you will have the option to restore data from iTunes. The downside is you will have to pay when you cross the free 5 GB storage limit. However, if you wish to enable iCloud backup, follow these steps.
- First, Go to Settings on your iPhone.
- Now, Tap on your profile (your name).
- Then, Go to iCloud and then iCloud Backup.
- At last, Turn it on.
From now, your iPhone will store your data and contents to iCloud. Later that can be restored if needed.
These are the best ways to backup your iPhone/iPad/iPod via WiFi or local network. If you have any questions or suggestions, put it in the comment box.